Simple Sport/DK Weight Socks
This post contains affiliate links. I may earn a small commission if you use these links, at no cost to you. Thank you for your support.
There are so many beautiful sock patterns out there, yet over the past couple years, I find myself repeatedly gravitating toward the method I’m sharing today because they’re simple, quick to make, durable, and most of all they fit my feet well. Every time. Without fail.
So I wanted to share my method for making these here because I’m asked about them often enough that I figured it was time to just go ahead and write a blog post about them. Apologies in advance to those who are newer knitters. If you’re looking for a sock pattern to guide you through the process, this probably isn’t going to be the most helpful of instructions because I’m not a pattern writer and I don’t spell everything out for you, but if you do some research on the basic construction of a sock, this might still be doable.
Another note before we begin: I almost always use US2/2.75mm circular needle for sock knitting rather than DPNs, so I’ll be writing my notes as such. Also, because sock yarn gauge tends to vary, I will often adjust my cast on number by four. So although I wrote the notes below using 52 stitches as the cast on number, I consider it more of a baseline. If the gauge seems light, I’ll cast on 56. If the yarn seems thicker than normal, I’ll go down to 48.
If you make these, I’d love to hear how they worked for you. Also, if you read through my notes and have suggestions or questions for clarity, please don’t hesitate to leave a comment below.

Simple Sport/DK Sock Notes
Using a US2/2.75mm circular needle and two strands fingering weight sock yarn held together, cast on 52 stitches with the German Twisted Cast On method.
Cuff
Divide the stitches so they are distributed evenly in half between each needle. Join in the round, being careful not to twist the stitches, and work 20 rounds K1, P1 ribbing.
Leg
Knit 30 rows.
Garter Heel Flap
For this next section, work only half (26) of the stitches on the needle flat (back and forth) to create a heel flap. The other half of the stitches will be set aside for now, and will make up the top of the foot.
Knit 26 stitches. Turn your work and knit the same 26 stitches until you reach the beginning. Continue until you have 30 rows and 15 garter ridges, ending on a wrong side.
Turn the Heel
(Right Side) Continuing on just the 26 heel flap stitches, knit until you are 9 stitches away from the end. SSK and then knit one. Turn your work so you’re facing the wrong side, and with yarn in back, slip the first stitch from your left needle onto your right needle. Knit until 9 stitches away from the end and SSK, knit one, and then turn.
(Right Side), With yarn in back, slip the first stitch on your left needle to your right needle. Knit until you are 7 stitches away from the end, SSK to close the gap and then knit one. Turn your work so you’re facing the wrong side, and with yarn in back, slip the first stitch from your left needle onto your right needle. Knit until 7 stitches away from the end and SSK to close the gap, knit one and turn.
(Right Side), With yarn in back, slip the first stitch on your left needle to your right needle. Knit until you are 5 stitches away from the end, SSK to close the gap and then knit one. Turn your work so you’re facing the wrong side, and with yarn in back, slip the first stitch from your left needle onto your right needle. Knit until 5 stitches away from the end and SSK to close the gap, knit one and turn.
(Right Side), With yarn in back, slip the first stitch on your left needle to your right needle. Knit until you are 3 stitches away from the end, SSK to close the gap and then knit one. Turn your work so you’re facing the wrong side, and with yarn in back, slip the first stitch from your left needle onto your right needle. Knit until 3 stitches away from the end and SSK to close the gap, knit one and turn.
At this point, all the heel flap stitches have been worked, and you have now turned the heel.
Pick Up Stitches
With right side facing, knit the heel flap stitches. When you get to the end, begin picking up stitches along the side of the heel. Pick up 16 stitches total.
Knit the 26 stitches that belong to the top of the foot.
Pick up 16 stitches along the other side of the heel flap, and place marker if needed to indicate beginning of round.
Gusset Decreases
Arrange the stitches on your needle so that the picked up stitches and the heel flap stitches are on one needle together (needle 1), and the 26 top of foot stitches are on the other (needle 2).
Continue knitting on needle 1 until 3 stitches remain. K2tog, K1. Knit the top of foot stitches/needle 2. On needle 1 again, K1, SSK and then knit until you reach the beginning of the round.
K1 round.
Continue in this way, decreasing the stitches for the gusset at the beginning and end of needle 1 every other row until the number equals the number of stitches on needle 2 (26).
Foot
Continue knitting in stockinette until you are 1 inch away from where you want your sock to end.
Toe Decreases
Make sure you have an even number of stitches on each needle.
Row one: Needle 1: k1, SSK, knit until 3 stitches remain, k2tog, knit last stitch. Needle 2: k1, SSK, knit until 3 stitches remain, k2tog, knit last stitch.
Row two: knit all stitches.
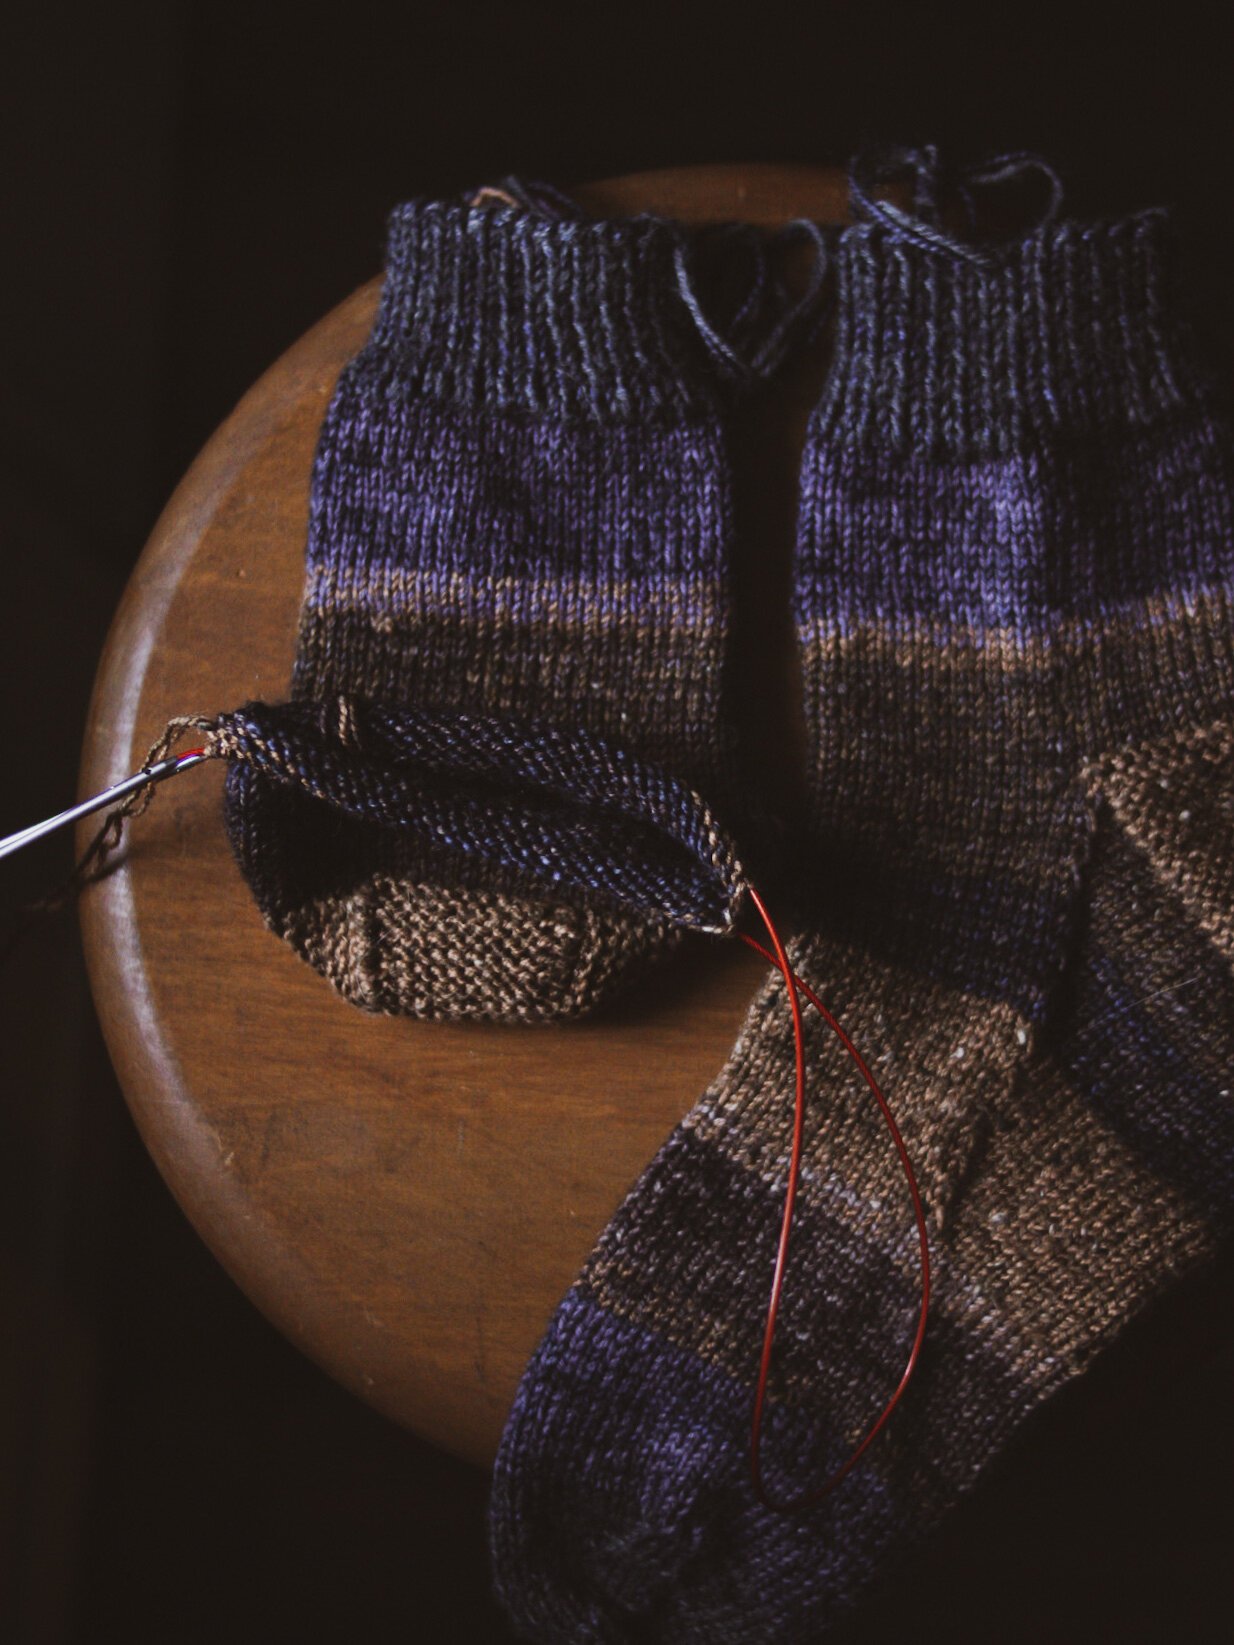
Repeat rows one and two, decreasing every other row, until you have 12 stitches remaining on each needle. Graft the toe closed with kitchener stitch and weave in ends.
